Olá
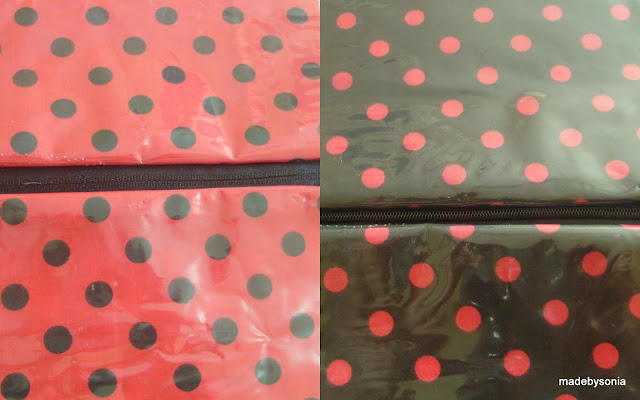
Desta vez atrevi-me a fazer uma necessaire plastificada, porque precisava de uma, para levar as coisas do banho, quando vou de férias ou de fim de semana.
Hello
This time have ventured me to make a necessaire plastified, because I needed one to carry things from the bath, when I go on holiday or weekend.
This time have ventured me to make a necessaire plastified, because I needed one to carry things from the bath, when I go on holiday or weekend.
Fiz a necessaire plastificada por dentro e por fora, mas podes fazê-la sem ser plastificada se quiseres.
Precisei de 2 tecidos diferentes (4*(0.18cm*0.22cm)), plástico para as mesas de cozinha (4*(0.18cm*0.22cm)) e um zipper (0.21 cm).
I made the necessaire plastified inside and out, but you can do it without if you want.
I needed two different tissues (4 * (0.18cm * 0.22cm)), plastic for kitchen tables (4 * (0.18cm * 0.22cm)) and a zipper (0.21 cm).
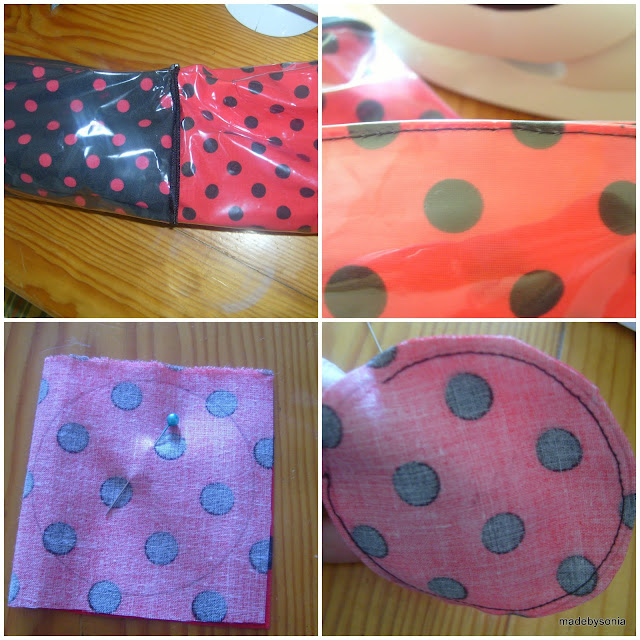
Junta-se o plástico ao lado direito do tecido, e trabalha-se sempre assim, como se estivesse colado no tecido.
Depois, faz-se uma sanduíche com os tecidos e o zipper no meio.
Primeiro coloca-se o tecido que vai ficar para fora na bolsa, com o direito virado para nós, depois coloca-se o zipper virado para baixo, e por fim coloca-se o tecido do forro também virado para baixo.
Joins the plastic on the right side of the fabric, and always works well, as if glued to the fabric.
Then, make a sandwich with the tissue and the zipper in the middle.
Then, make a sandwich with the tissue and the zipper in the middle.
Put in the first place, the fabric that will face out in the bag, with the right side facing us, then place the zipper face down, and finally puts the fabric liner, also facing downwards.
Sew it all together, shifting a little bit down on the bulky zipper.
Repete-se tudo do outro lado.
Atenção ao colocar os alfinetes, por causa dos furos no plástico, devem-se colocar sempre na parte do tecido que vai ficar escondido nas bainhas. A minha bolsa ficou com furinhos. E também não se podem enganar a costurar, porque depois fica tudo furado.
Is repeated all the other side.
Attention to put the pins because the holes in the plastic, should always be placed on the tissue that will stay hidden in the sheaths. My purse was left with holes. Nor can deceive sew, because after everything is stuck.
Fica assim, a parte de fora do Zipper com o tecido de fora, e a parte de dentro com o forro.
Depois junta-se os tecidos iguais direito com direito, e cose-se tudo à volta, mas muito importante: antes de fechar os tecidos de fora deve-se abrir o fecho , para depois se conseguir virar o trabalho.
No tecido do forro, eu coso tudo e depois faço uma abertura para virar o trabalho. Acho mais fácil coser tudo e depois abrir, porque o tecido fica logo marcado, para mais tarde voltar a fechar.
Then joins the fabrics equal right with right, and stitch it all around, but very important, before closing out the tissues must open the lock, only to be able to turn the work.
The fabric lining, I sew everything and then make an opening to turn the work. I find it easier to open and then sewing it all, because the fabric is just marked for later re-closing.
Para fazer os cantos da bolsa, dobram-se os cantos, para medir igual dos dois lados. Depois é só coser e cortar o excesso.
No tecido de fora, medi 3cm e no forro, medi 2 cm.
To make the corners of the bag, the fold edges, to measure the two equal sides. Then just sew and trim excess.
In tissue from the outside, measuring 3cm and the lining, measuring 2 cm.
Chegou finalmente a altura para virarmos o trabalho!
E cose-se a abertura do forro.
Se quiseres, podes coser no final do zipper, um circulo, ou um quadrado.
Finally reached the turning over time for work!
And stitching the opening of the liner.
If you want, you can sew at the end of the zipper, a circle or a square.
E pronto a bolsa necessaire está pronta, para ir de férias contigo!
And the bag necessaire is ready to go on vacation with you!


Olá, Sônia!
ResponderEliminarMuito lindo seu blog! Adorei os colares! Coloridos e originais! Parabéns!
Agora estou te seguindo para não perder as novidades ;-)
Grande abraço,
Debora
Olá Debora!
EliminarObrigada pelos seus elogios.
Seja bem-vinda!
Bjs
Sónia
Parabéns! Ficou linda, prática e durável.
ResponderEliminarObrigada!
EliminarBjs
Sónia